Featured Tutorial

Flag Party Favor, Plus a Bonus Printable Stencil - FREE!

Okay, This is Cool

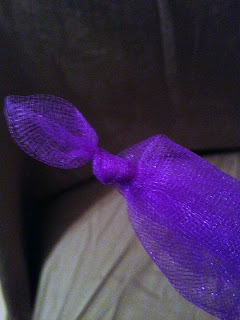
NEW SECTION – APP Appreciation: Knotch (Say it in Color)

Featured Riot Tip

The Cloud Light - Building It Better

Seasonal Tutorial: Winter Holiday

Winter/Holiday Themed tutorials to light up anyone's season!

Featured Artist: Sheila Haring

Winter Tree Nail Art

Sunday, September 30, 2012

Riot Tip: DIY Panels for Material


Riot Tip: DIY Panels for Material


Keep your fabric organized and easy to store by making your own panels! (Also works with tulle, lace, trim and strap-like materials) 


  • 1st find a large cardboard moving/packing box that has 4 panels like the image below. Don't worry if your box is taller or shorter in height, you only need the panels (the pieces that the red arrows are pointing at).


  • Take a pair of scissors to the box and cut off the panels of the box (you'll end up with 8 panels per 1 box!)


  • Wrap your material around the box panel. (I folded my material in half so that it wrapped easier)


  • One piece of material per box panel is suggested however multiple materials can be applied if space allows it. Materials such as lace and trim tend to take up less space. 


  • Use a piece of masking tape to secure the material to the panel or tuck the end into a fold of the wrapped material.


Go from this:

(Before)


To this:


(After)


Thursday, September 20, 2012

Riot Tip: Hanging Photos in Your Cubical

Riot Tip: Hanging Photos in Your Cubical 

(Without having it look like a teenager's locker)


This tip is dedicated to those of you who (like me) find yourselves in a cubical from 9 to 5, Monday through Friday and have grown tired of your cubical walls looking like some teeny bopper's bedroom wall. I'm talking about all the thumbtacks you use in order to keep some personal sense of self to an otherwise conventional workspace.


"But the thumbtacks are the only way to hang my photos on the fabric panels", you say.
Well to that I say, "Nay!"

Here's a neat trick I did for the photos I hang on my cubical walls:


Step One:
Take your images and measure it to a piece of foamcore (I prefer matte black, but use whatever color you can find), leaving at least an inch of space around the image. (this gives it that framed look)


Step Two:
Cut out the "frame" from the foamcore. You now have your base.

Step Three:
Glue (or double sided tape, spray mount, Xyron, stick) your image to the center of the foamcore.

Step Four:
On the back of the foamcore frame, glue (or single side tape if you don't care that it might slip out) a large paper clip to the middle of the board leaving enough of the paper clip visible so that you can use it as a hook.


Step Five:
Place a CLEAR push pin into your cubical wall and slip the paper clip (now attached to the foamcore frame) over the push pin.


And you're done!

If you're wondering why I do this instead of just buying a frame, the reason is because most cube walls won't hold much weight and so because of this I've had about 5 frames fall off my walls and break. The foamcore is lightweight and doesn't pull the push pin out of the wall.

Saturday, September 15, 2012

Tutorial: DIY Baby Wings


Tutorial: DIY Baby Wings


Create wings for your baby yourself, using this tutorial. Tutorial can be used for creating wings for yourself or larger children, size of items used with just need to be adjusted to accommodate size.


Items Needed -
BASE:
  • 2 Wooden Embroidery Hoops (both sides need the screw, so you'll need two. the 2nd hoop that is included isn't the same size, so it isn't needed)
  • Tights or panty hose or stockings (some kind of stretch nylon material, these are preferred.) (Color, depending on what you want it to look like)
DECORATION:
  • Pom poms (various sizes and/or colors)
  • Fabric Paint
  • Adhesive spray
  • Loose/fine glitter
  • 1/2 yard of tulle one color
  • 1/4 yard of tulle other color
  • Sewing thread
  • Sewing needle
  • Glue (depending on how hard your kid using these, I went with super industrial glue)
  • Elastic headband, aka Stretch Crochet Braid Trim (You can use a variety of items to attach, it really depends on your child)


Step One:
Remove the screw from both embroidery hoops (you will only need one to connect)

Step Two:
Carefully place the embroidery hoop within the tights. 

Step Three:
Tie off each end (tightly and so that the fabric is tight around the loop). Remember that these ends will not go away, so think about how you want to setup your wings so that you can accommodate for these knots (I put pom poms over mine)


Step Four:
Cut the ends off of the hoop. Your ends should be cut close to the knot. If you are using a stocking with a foot, you'll only need to do this once.


Step Five:
Cut a teeny tiny hole in near the metal hole and pull that out on each one.

Step Six:
Attach the hoops together like so


You now have a base of your wings.


If you would like to continue with decorating them similar to mine, please continue the tutorial. If you would like to skip to attaching the wings, continue to Step Twelve.


Step Seven:
Apply your Fabric Paint along the edges of the front portion (the side of the wing that is facing outward when it is being worn) of both sides.


Step Eight:

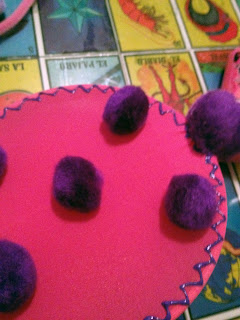
Using your glue, apply 5 large pom poms to the center-front of each wing (total of 10)


Step Nine:
Using your glue, apply 1 large pom pom to the end of each wing to cover up the knot made when creating the base (total of 2)


Step Ten:

Using your glue, apply 2 smaller pom poms to the middle of the wings to cover up the screws that connect the two wings.


Step Eleven:

Add tulle to your wings by sewing small strips to the back (non-decorated side) of the wing base, using your needle and thread. (Be careful not to sew into the top of the wings. Your thread should not be visible on the front of the wings)


Step Twelve:

Attach your Elastic Headband to the back (non-decorated side) using your sewing needle and thread.
Spread the headband across the back and sew it over both wing pieces. This should be sewn so that it is securely attached to both ends. This is what will attach the wings to your child.

Step Thirteen:

For a little extra sparkle, take your adhesive spray and lightly spray it once over the wings. Take your glitter and lightly dust it over your wings for desired amount of sparkle.


And you're done!


Tuesday, September 11, 2012

Riot Tip: Over-the-Door Shoe Organizer

Riot Tip: Over-the-Door Shoe Organizer

Why do I love this idea you ask?

WELL…if you're anything like me, you've got piles and piles of trinkets and tools hidden all over your craft room just waiting to be put to good use. Let me emphasize HIDDEN.

I don't know how many times I've gone through my craft room in a, what would be assumed crack head induced, cleaning spree and finding items that would have been 'so useful at that time' had I actually remembered that I owned them. Glue I forgot about, scissors I now had 4 pairs of now, paint I didn't even remember buying; all this little stuff that I could have used but didn't because I hid it away in drawers and boxes forever ago and completely forgot about it. Out of sight out of mind. (I also tended to forget where I put some items so that didn't help either.)

This was my solution:


I know what you're thinking:
"How did I not think of this before?!"
It has the versatility of being out of the way but right there in your face as well as being something easy to afford. You can see everything that was in it and even the smallest trinket was visible!

It's the perfect idea for the 'I have too much stuff'  kind of crafter.

You can purchase these in all kinds of styles (I recommend clear so you can see what's inside of it) and sizes, at a fairly cheap price. I think I paid under $10 for mine at Wal-Mart. 
Other places I have seen these sold at are Target, Big Lots, Bed Bath and Beyond, K-Mart, Goodwill (used), some Dollar Stores, Ross and other various department stores.

I recommend avoiding buying these at craft stores though. Some craft stores have figured out this is a way to "cash in" on a good idea and have customized products that they charge a ridiculous amount for.


Twitter Delicious Facebook Digg Stumbleupon Favorites More