Featured Tutorial

Flag Party Favor, Plus a Bonus Printable Stencil - FREE!

Okay, This is Cool

NEW SECTION – APP Appreciation: Knotch (Say it in Color)

Featured Riot Tip

The Cloud Light - Building It Better

Seasonal Tutorial: Winter Holiday

Winter/Holiday Themed tutorials to light up anyone's season!

Featured Artist: Sheila Haring

Winter Tree Nail Art

Tuesday, October 30, 2012

Tutorial: DIY Chalkboard Mason Jar Favor


Tutorial: DIY Chalkboard Mason Jar Favor
(Halloween Addition!)


Need a last minute favor for your next event? (In this case it will be for Halloween)
Try this tutorial and in no time, you'll have a cool and nifty trinket for your next bash!


Items Needed:

  • Mason jars
  • Chalkboard paint (I picked up mine at Home Depot, but many other stores carry this)
  • Paint brush
  • Candy
  • Possible items to decorate it with (however, I left mine blank since I used chalkboard paint)
  • Chalk for your recipients to use
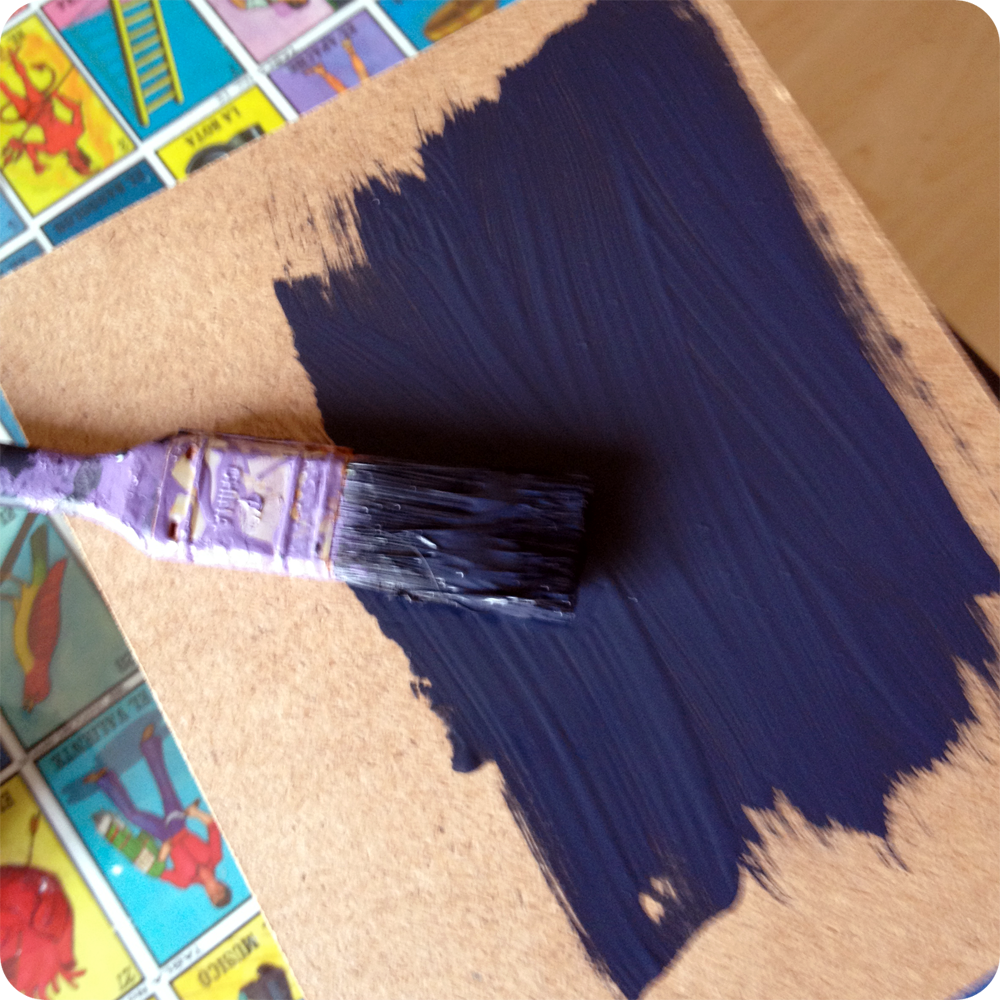

Step One:
Using your paintbrush paint your mason jar with your chalkboard paint.


Step Two:
Wait for the paint to dry and then paint another layer over it so that you have a solid black matte coat.


Step Three:
Wait for jar(s) to dry.


Step Four:
You can either leave your jar as it is and give it out as a chalkboard jar, or you can decorate it in various ways. Either way, once you're done your last step is to add candy! (Never add candy while working with glue, paint or anything that could be harmful to someone's health.) 

Don't forget to include chalk when you give out your jars! People love to draw on them!

Here are some alternative ideas if you want to give your jars more flare:
- Glitter (using glitter and mod podge)
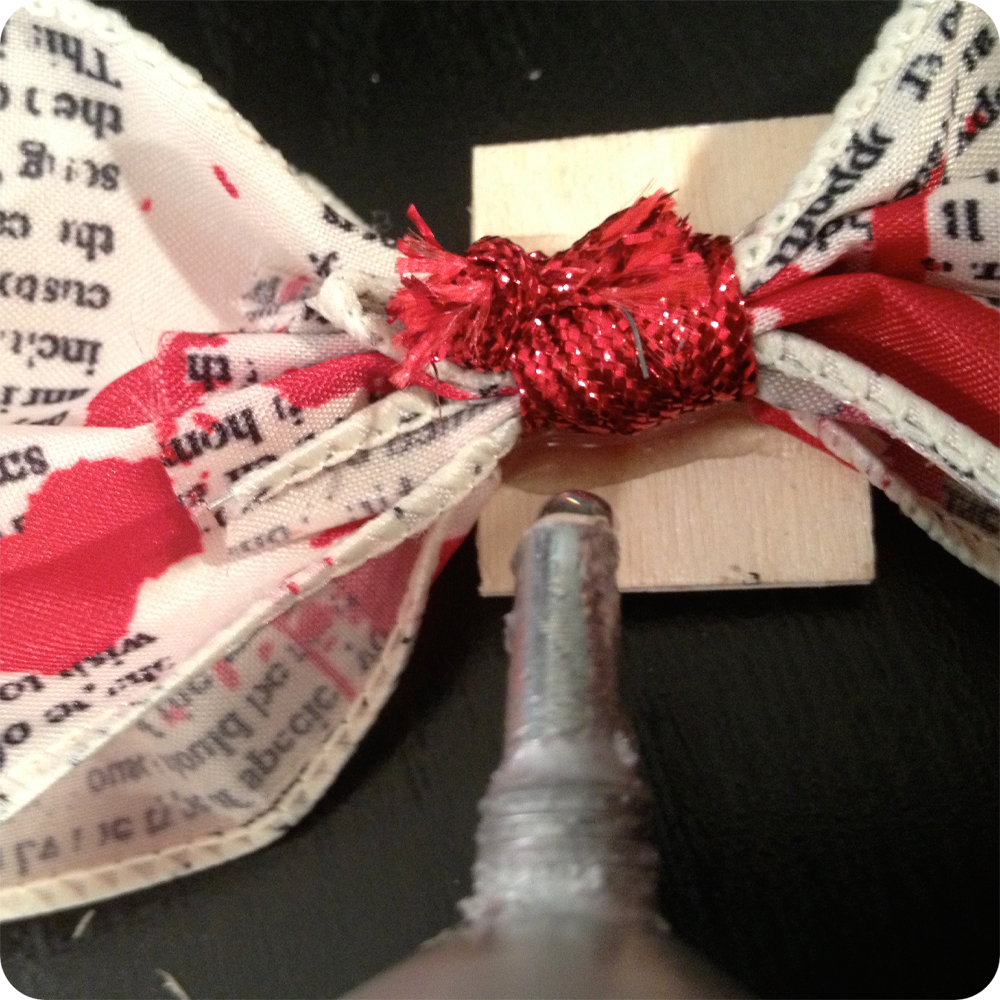
- Ribbons (wrap around the jar or glue a bow to the lid)
- Make a dripping blood-like effect


(to achieve this effect, go to this Riot Tip)

Riot Tip: Use a Glue Gun to Melt Crayons

Riot Tip: Use a Glue Gun to Melt Crayons


Want to create a more controlled "melted crayon" effect?
Try placing them in a hot glue gun and use the gun like you would a pen!


The wax drips out so be careful to hold upright until you are ready to draw.The good thing about the wax though, is that it dries quickly and creates a beveled effect much better than paint.
I used it on this mason jar to create a "bloody" effect on one of my projects!


News: Stardate 103012

New tutorial and Riot Tip up now!

This post has been updated as I have been able to post the Tip and Tutorial I've been meaning to write.

In other news, I was able to get some super cute photos of my little one in her Halloween costume before the 'big day'!
Here are some pictures of little 'Baby Riot' in her Halloween costume (made by yours truly) for her first Halloween ever. (She's a princess lady bug)


The tutu was made from an elastic headband/Stretch Crochet Braid Trim and several colors of tulle (tutorial to come), the wings were made from the DIY tutorial Baby Wings Tutorial and the purple "ears" were made from pom poms glued to alligator clips.

She had a lot of fun wearing it to my work's family event. Hopefully she'll enjoy it just as much tomorrow when she walks the town (or at least the block) with her daddy.

Happy Halloween everyone!!

Sunday, October 14, 2012

News: Stardate 101412


I've decided to add a "News" section so that I could keep this blog an 'active blog' while I am in-between tutorials, tips and other fun site-add ons. 

I'm pretty excited to announce that the blog as seen well over 800 hits (which if you think about it, is pretty good for a site with a 'blogspot' URL)!


So I'd like to start this first update with a HUGE THANK YOU to everyone who comes to read the blog! I really hope it's useful to you and please let me know if you have any questions about any of the tutorials or tips that need answering. I understand that sometimes the way I explain things may not make sense, so please ask questions. I promise I won't get defensive about feedback!


I'd also like to encourage you to leave comments, send me a shout out if you'd like to be a featured artist, or if you have any tips that you'd like to share with the site. I always give artists 100%-full credit and a link back (if you'd like), so just let me know!
You can also feel free to post (or send me) pictures of how your project turned out from any of the tutorials posted! I will do an update with the photo in it, referencing the tutorial/tip you used and a shout out to you, so please do not get upset if I post it.

Anyway, short update but it's the 1st so I'm sure you understand!

I promise I am going to try to be one of those craft blogs that updates as much as possible, so please keep checking back for updates! 

You can also subscribe to the blog in order to get update notifications, friend me on Facebook (click the  Facebook icon), Pinterest and Twitter for postings! 

I respond to all comments and postings to the best of my ability, and always friend back!

Thank you again!

-Ciao for now-

Rhi Riot

Sunday, October 7, 2012

Tutorial: DIY Chalkboard Picture Frame


Tutorial: DIY Chalkboard Picture Frame


Make a funky-cool message board using chalkboard paint and a picture frame! 
A simple tutorial you can do in just a few easy steps!


Items Needed:

  • Picture frame (the one I used, I found at Target)
  • Chalkboard paint (I picked up mine at Home Depot, but many other stores carry this)
  • Paint brush


Step One:
Take apart your photo frame and use either the backing or the glass as your "chalkboard surface".
(I chose to use the backing as I liked the feel of the surface more than I liked the glass, but choose whichever you like more).


Step Two:
Using whichever backing you've chosen, paint that surface with the chalkboard paint.


Step Three:
Wait for the paint to dry and apply a 2nd coat. Follow the directions on your chalkboard paint for appropriate wait time.


Once dry, put your picture frame back together and you're done!


Wednesday, October 3, 2012

Featured Artist: Theresa "Nacho" Montiel


Featured Artist: Theresa "Nacho" Montiel

Get to know DIY Riot's Featured Artist, Theresa "Nacho" Montiel. A professional graphic designer, retired roller derby blocking super star (aka 'Nacho Girlfriend'), avid crafter and all around kick ass female extraordinaire, Theresa has kindly offered to share her creative genius with the world and give us a step-by-step tutorial on Xylene Transfers!  


Let's get started...


"Xylene Transfers Tutorial"

By: Theresa "Nacho" Montiel

Perhaps you have seen/heard of xylene transfers before...

You know the ones, where you mirror a piece of art or text via a copy machine...use a Chartpack Blender Marker (p-0)...then rub until your hands are numb -- and then -- viola!  Cool stamp like transfer of your intended art!


No....???

Well, here is a cool link to show you how that works -- its very quick.
Feel free to check it out...I will be here when you get back.

Welcome back!  

Now that tutorial was honest, quick and painless...and it's great if you want to transfer your graphic to just paper.  
But what if you are looking for something more mixed media based...or you wanted to transfer to a working canvas?  

This is where the beauty of ABSORBENT GROUND from Golden and XYLENE (markers or ink) can come into play.

First what are these products?  

Well, Absorbent Ground is an acrylic medium (think acrylic paint) that when applied and dries, turns into a highly absorbent, very porous, paper "acting" surface. So when applied over gessoed canvas or board, it allows for watercolor and staining techniques to be applied as it would as if you were painting on watercolor paper.  

And what the heck is Xylene?  

Xylene is actually the vehicle...or the "ink" that carry the colors that art markers are made of. You know the funny smell that gets you kinda fuzzy after drawing with markers for a while?  
That's Xylene.  
So Chart-Pack makes a "color-less blender marker" called P-0 (letter P dash number zero).   Marker artist use them to -- you guessed it -- to blend their colors as they illustrate and create...but for our use today we are going to use Xylene for its TRANSFERRING qualities.

Since gesso is an acrylic primer -- and plastic when dry, canvases and prepared boards are not, traditionally, good xyline transfer surfaces.  
But with Golden's Absorbent ground it changes that.  
Absorbent Ground is feels a lot like gesso...its white and has a similar viscosity.  
So it being similar to gesso, you can manipulate it similarly.  
Meaning you can build up textures with absorbent ground...or even tint it.  

For Xylene Transfers I think it is better to have a sooth texture...so you will need the items listed below

Items Needed:
  • A canvas or board -- size of your choice
  • Golden Absorbent Ground
  • A soft bristle gesso brush for smooth application of the absorbent ground
  • Xylene can for larger projects
  • Chartpack P-O Blender Markers (Xylne Marker) for smaller jobs.
  • Acrylic Paint color of your choice (if you want to tint the background)
  • A burnishing tool -- a spoon, a bone folder, or the P-0 marker itself can be used as a burnishing tool
  • Copy your desired image or text in reverse (or mirrored)
  • Masking or painters tape helps...but not necessary
  • Watercolor brush -- either wash or round depending on the area you would like to transfer
Step One:
Tint your Absorbent Ground with the color of choice and then paint your canvas or board with your concoction of your desired color.  
You can cover the canvas fully or simply paint where you know you want to transfer your image, then let it fully dry.


Step Two:  
Once dry, set your mirrored copy of your desired transfer, ink side down, on the canvas.  And depending on the area you would like to transfer 8x10 and smaller are good for markers, and anything larger I would use the Xylene in a can. 

(If you can or want to, I would recommend purchasing one of each and doing a few experiments, to see which process you like better. Each have a slightly different result.)

For mine, I like the pressure and stamp result of the P-0 marker....plus I have a box lying around from my last project concerning.  

So seeing where the letter forms and design elements are from the back of the paper, I only draw on the area that I want to transfer and use my pen pressure to burnish the ink from the copier paper onto my canvas and distribute the xylene ink on the area.  


You can see this happen as the paper gets wetter and wetter from the marker distributing the xylene (or colorless ink)...but you can also check your status by taping down an edge in place, so your original copy stays in line and lift the copier paper to see your process.  


If you want more of a transfer of your image, you can burnish the design with a spoon or a bone folder.

Check out the finished result.  
I decoupaged a photo over the transfer too...


--------------------------

If you'd like to contact Theresa or see more of her work, please visit:
http://nachomommasdesigns.com

Tutorial: DIY Hair Bow

Tutorial: DIY Hair Bow


Create an awesome hair bow accessory for yourself, a friend or whomever.
Spice it up using unique ribbon and accents that really speak to your style!

Items Needed:
  • 2" Wide Ribbon (preferably wired ribbon)
  • 3/16" (5mm) Wide Ribbon to tie bow with
  • Alligator Clip (one per bow)
  • Scissors
  • An accent of your choosing to glue to the center of your bow
  • E-600 Industrial Glue


Step One:
Using your scissors, cut 12" of ribbon off of the spool.

Step Two:
Create a circle with the ribbon by looping the ends together. Allow for some overlapping of the sides so that you're able to securely keep the two sides together.

Step Three:
Flatten the ribboned circle in the middle using your thumb/fingers.


Step Four:
Pinch the sides of the ribbon, while still keeping the shape of the bow on both ends.


Step Five:
Using your scissors, cut off 8" of your 3/16" (5mm) Wide Ribbon.

Step Six:
Wrap your 3/16" (5mm) ribbon around the center of your larger ribbon to keep the pinch you've created in the center secure. 


Step Seven:
When you are finished wrapping the smaller ribbon around the center of the larger ribbon, tie off the smaller ribbon in a knot and cut away the extra strands so that the center of your bow is as flat as possible.

Step Eight:
Using your Industrial Glue, glue your accent to the front of your bow (the front is whichever side looks the nicest) placing the glue on the center where your smaller ribbon has just been placed. Wait for accent to dry.

Step Nine:
Once your accent is dry, flip your bow over and apply your industrial glue to the other side of the center where your smaller ribbon has been placed.

Step Ten:
Apply your alligator clip one of two ways, depending on how you want to wear your bow. Set it on top of the glued area and wait for glue to dry.


And you're done!

Twitter Delicious Facebook Digg Stumbleupon Favorites More